In Review...
In AppSheet & FRC: Episode 0, I went over what scouting is, why it’s essential, and gave a broad overview of the scouting process. I also covered a few minor prerequisites necessary to get the most from this series.
It is assumed below that you already have Google and AppSheet accounts before starting.
Getting Them Talking
The first step to creating a new app is to get AppSheet and GoogleSheets linked up, or in other words, to get them to talk to each other. To do that, create a new spreadsheet and name it something appropriate. I’ve named mine FIRST Scouting 2022 Tutorial. Then go to the tab at the bottom and rename the current sheet to Match Scouting. Add the word Key in A1 and the word Value in A2.
Next, go to AppSheet and click Create > App > Start with existing data. Name it something appropriate and memorable (probably the same thing as your spreadsheet) and click Choose your data, selecting the spreadsheet you just created as your data source. You can leave the Category blank.
This will bring up the AppSheet interface. Spend a few minutes familiarizing yourself with it if you wish. Once you’re done, return to the Data tab (which should be open by default). Click Columns at the top and then click on the Match Scouting table. Your view should be similar to the image on the right.
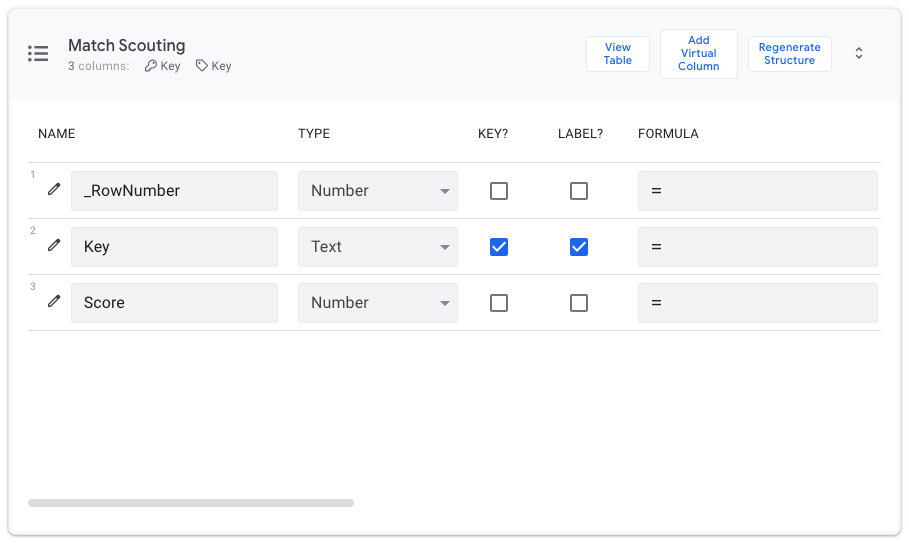

Update the Type for the Score row to Number from the dropdown if it isn’t that by default. Then click the pencil next to the Key row and untick the Show? box. Select Auto Compute > Initial Value. In the text editor that pops up, type UNIQUEID(), then press Save. Select Display and untick the Label checkbox, then select Other Properties and untick the Searchable checkbox, then press Done. In the upper right, press Save.
Congratulations! You now have an app that can intake data and record it to Google Sheets. Using the preview window on the right of AppSheet, test it out by recording a few numbers, then check Google Sheets to see if it has saved your input.
Notice that the UNIQUEID() function automatically populates the Key column. These automatically generated values are (not at all coincidentally) called keys: strings1A string is a series of characters or numbers; in other words, it’s a piece of text. that uniquely and consistently identify their row. Using a row’s key rather than its row number to refer to it is vital because row numbers do not stay consistent: if you insert or delete rows from your spreadsheet, row 8 might become row 9 or vice-versa; however, the row’s key will remain the same, allowing AppSheet to keep track of different entries even if their row numbers change. The UNIQUEID() function is helpful because it automatically generates a new guaranteed-unique key for each new data submission.
Meta Information
When we’re analyzing our data later, it won’t be practical to merely have a series of scores without knowing which robot they belong to or at which competition the robot in question achieved that score. At times, it can also be handy to know which person submitted which data entry and when they submitted it.
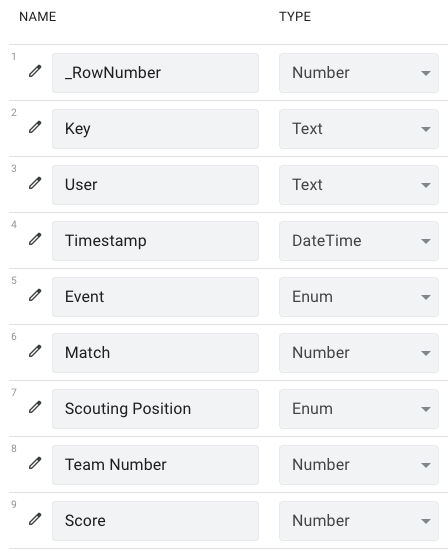
To collect this information, we’re going to add six new columns: User, Timestamp, Event, Match, Scouting Position, and Team Number. Insert these values in the top row between the Key and Score columns so your spreadsheet looks similar to the image below.

Then, head back to AppSheet and press Regenerate Structure for the Match Scouting Table. Using the same menus as you did for Key and Score, update the data types for your new rows to match the screenshot on the right. Hide User and Timestamp so they aren’t shown to the user by unticking the Show? checkbox like you did for Key earlier. Then, set the Initial Value for each to be calculated by the USEREMAIL() and NOW() functions in the same way as you did for UNIQUEID() earlier.
At this point, you might be wondering what an Enum is. Short for Enumeration, you can think of an Enum as a piece of text, except that AppSheet will only accept specific values for that text. If you’ve ever navigated a dropdown menu or selected an option from a series of radio buttons, that’s equivalent to an Enum in AppSheet. We’re using them here because we don’t want the user to be able to input any arbitrary value for Event or Scouting Position, only a few predefined options.
Of course, those Enums have no available options right now, so let’s set them. For Scouting Position, hit the pencil to edit its details, then under Type Details > Values > Add, add six new values and populate them with the phrases Red 1, Red 2, Red 3, Blue 1, Blue 2, and Blue 3. Make sure the Allow other values checkbox is unticked, and under Type Details > Input mode, select Dropdown.
The available options you want for the Event column will depend on where your team is located and what competitions they plan to attend. For this tutorial, I’ll use the FIM District Gull Lake regional competition and the FIM District West Michigan regional competition as my examples since those are the regional events that 5675 competed in during the 2022 season.
Now, you could merely fill in Event to have the two possible values of Gull Lake and West Michigan. However, I suggest using the event codes rather than the event names. Not only does this more robustly and precisely describe which event is being attended, but if you ever decide to add any integrations with TheBlueAlliance, having the event codes already available will be convenient. To find the event code for an event, look at its page on TheBlueAlliance and copy the portion of the URL that appears after /event/. For example, the event code for Gull Lake is 2022migul based on the URL https://www.thebluealliance.com/event/2022migul.
At this point, it’s time to test your app again. Save your changes,2You might get a few warnings saying that ‘User’ and ‘Timestamp’ were set to be unsearchable or that a new label was chosen automatically for you. Ignore them. delete the two entries you previously made, and then use the preview window to make a few new ones. After doing so, Google Sheets should show you something similar to the screenshot below.

What Next?
Being able to record numbers is nice, but it’s not close to enough for a complete scouting app. The next step is to change from simply recording a single number to recording a set of valuable information that details a robot’s performance in a given match. To do this, we’ll need to add a lot more columns.
In the next episode, I’ll show how to add various columns for tracking a robot’s performance and how to create multiple screens for the user as the match progresses (one each for the Prematch, Autonomous, Teleoperation, and Postmatch periods).